Set Up the Financial Document Center
Note
No setup is required in J1 Desktop to support the Financial Document Center feature; however, in order for students to view their documents in the Financial Document Center, any 1098-Ts and statements must be generated in J1 Desktop.
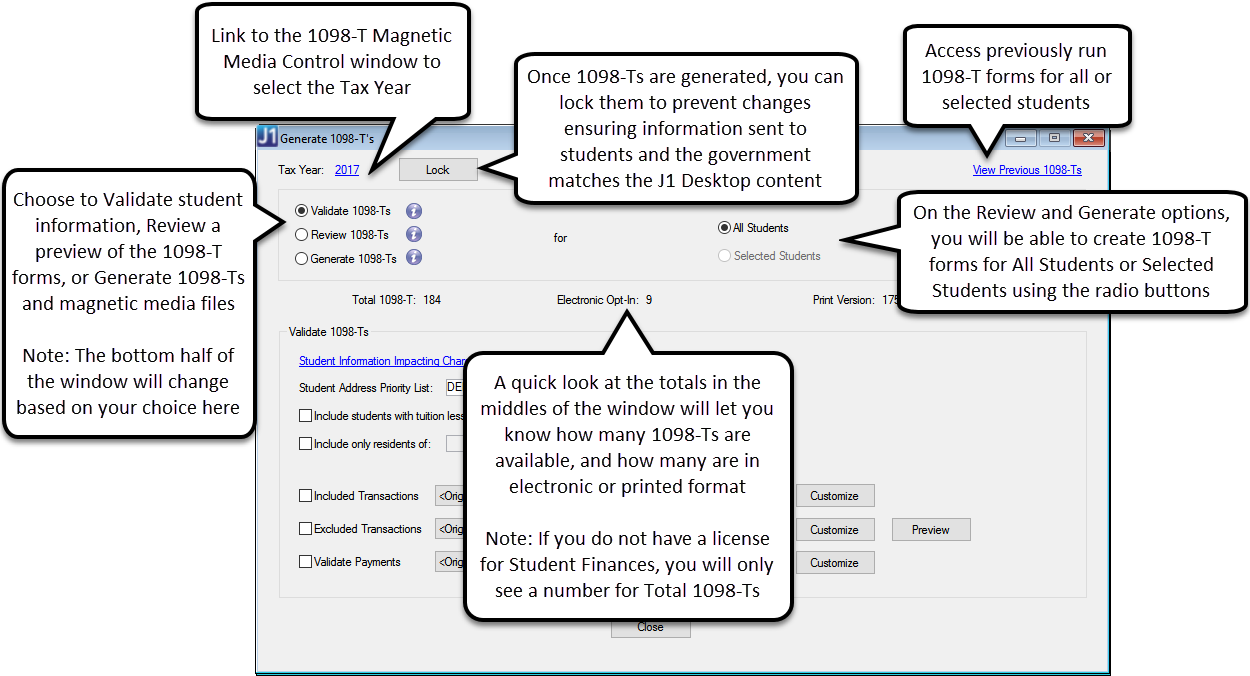
Run the Generate 1098-Ts process in J1 Desktop to populate the Student Year Reporting Table in order for students to view 1098-T information.
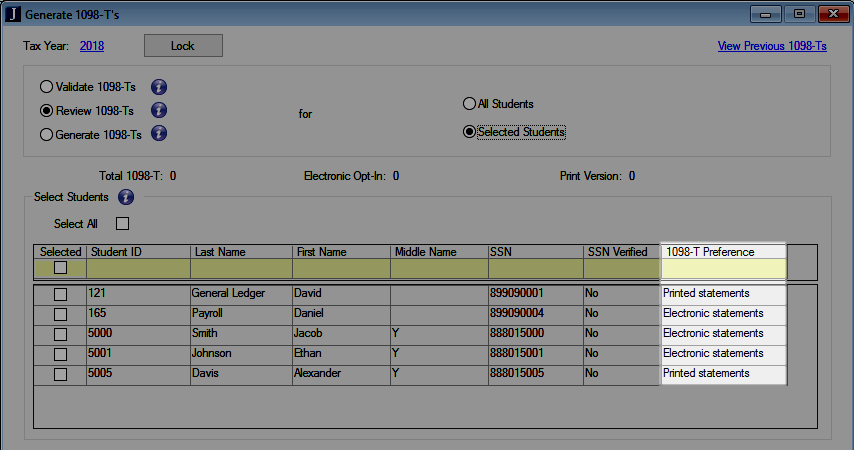
If students have consented to online forms, they will be able to access their 1098-Ts. You can see which students have consented to online forms by going to the Selected Students and viewing the 1098-T Preference column.
Tip
If you want students to receive a notification when a 1098-T published, you will need to setup the Delivered 1098-T message on the Set Up Notifications window in J1 Desktop.
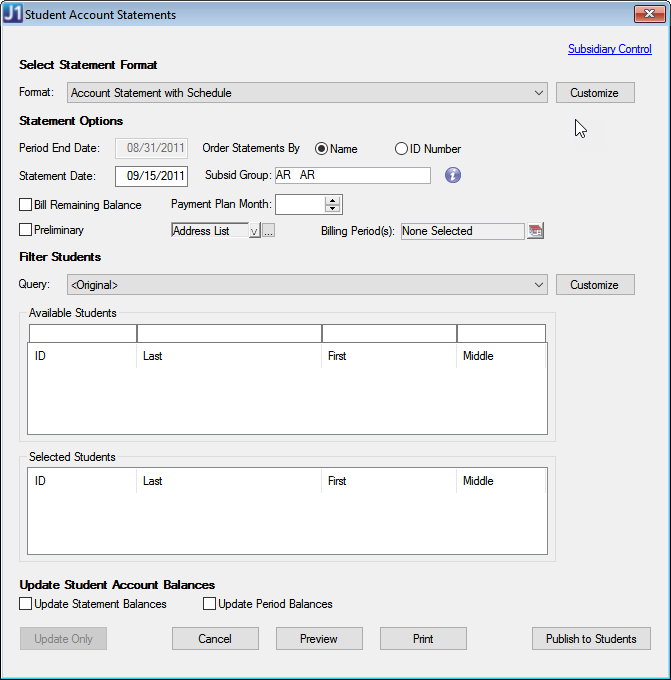
Generate student A/R statements from the Student Account Statements window. You must click the Publish to Students button to generate student statements. Once statements are published to students, if the student has a statement they will be able to access the statement on their My Financial Account portlet.
Use this page to determine the type of documents that will appear in the Financial Document Center.
Log in as the Campus Portal administrator.
From the Financial Document Center feature, click the Settings
 option.
On the Settings page, click the Account Statement tab.
In the Account Statement Display section, decide if you want students to be able to view the latest and historical PDF versions of their Account Statements in the Financial Document Center. Choose the Yes or No radio button.
On the Settings page, click on the 1098-T tab.
In the 1098-T Display section, decide if you want students to be able to view their latest and historical 1098-T forms in the Financial Document Center. Choose the Yes or No radio button.
Once you have made your selection, click Save Changes.
Use this page to determine what text appears on the Electronic and Printable Consent pages. Students must read these messages before opting in to receiving either electronic or printed 1098-Ts. While some generic text is provided, you can edit or replace it to fit your school's needs.
Log in as the Campus Portal administrator.
From the Financial Document Center feature, click the Settings
 option.
On the Settings page, click on the 1098-T tab.
Edit the content in the Electronic Consent Message and Printable Consent Message sections.
Decide if you want students to have the ability to switch from electronic to printed 1098-T forms. Selecting Yes will allow students to go back to a printable format after opting into an electronic version, while the No option will not allow an online change after they opt into electronic statements.
Once you have made your selection, click Save Changes.
Log in to the Campus Portal as an administrator and navigate to the appropriate feature page.
From the Admin Toolbar
 , click Access. The Access page appears. Campus Portal roles that have access to that page are indicated by a green visible
  symbol while roles that do not have access are indicated by the red hidden
  symbol.
Click on the Campus Portal role you are setting up permissions for. If the role has not already been granted access to the page, click the button to toggle it to Visible
 . Additional permissions appear.
To grant administrative privileges to a Campus Portal role, click the button for the Allow this role to manage this page permission to move the toggle to "Yes". Administrative permissions will allow the users in the role to add or remove features and set page and feature level permissions.
To grant administrative privileges to a Campus Portal role, click the button for the Allow this role to manage this page permission to move the toggle to Yes. Administrative permissions will allow the users in the role to add or remove features and set page and feature level permissions.
Changes are saved automatically.


